1.使用SharedPreferences处理数据的 新建 储存 读取 删除
SharedPreferences保存后生成的是XML文件,内容是以节点的形势保存在文件中,SharedPreferences类提供了非常丰富的处理数据的方法下面我向大家介绍一下如何使用SharedPreferences来处理数据。
输入须要保存的内容

输入姓名:雨松MOMO
输入号码:15810463139
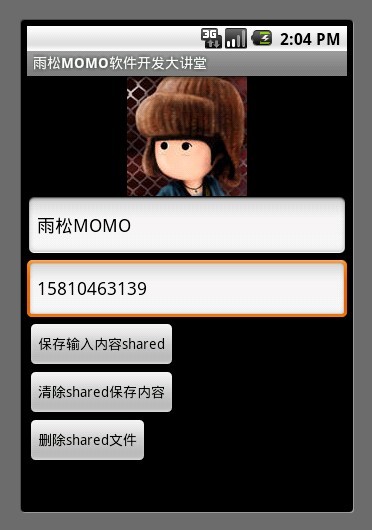
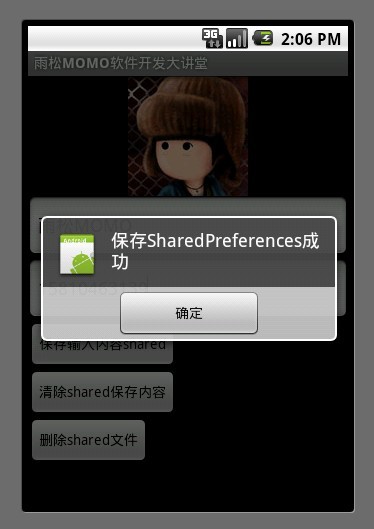
点击保存成功
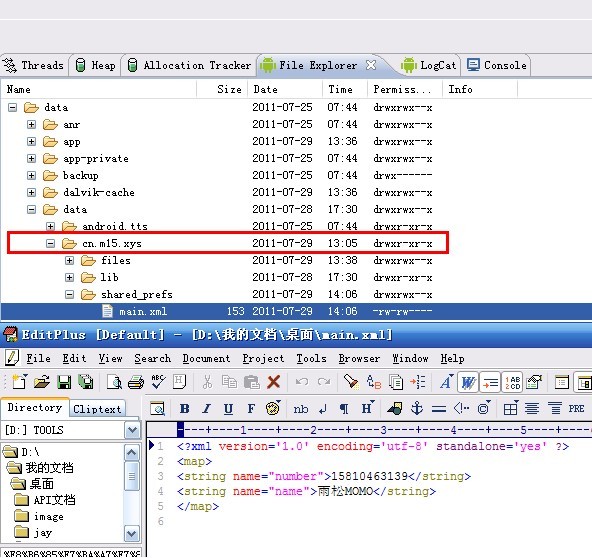
保存成功以后,数据被保存到了data路径下 /当前包名 (红框内的包名是我的程序包名) /shared_prefs/main.xml中 , 使用EditPlus 打开保存的内容,我们可以清晰的看到内容是以一个节点一个节点的形式存在XML中。
SharedPreferences类中提供了非常方便方法去保存数据与读取数据大家请看下面的代码片段,一个程序中可以存在多个SharedPreferences保存的XML文件 ,代码中只须要根据不同的XML名称就可以通过方法拿到相应的对象,由于它的批量遍历查找,当然这样的作法肯定没有数据库更方便快捷,所以在开发中处理一些比较小的零碎的数据就可以保存在这里,比如说记录软件中用户设置的音量大小,用户输入的查找信息等等都可以存在SharedPreferences中。
- public class SPActivity extends Activity {
- /**使用SharedPreferences 来储存与读取数据**/
- SharedPreferences mShared = null;
- /**程序中可以同时存在多个SharedPreferences数据, 根据SharedPreferences的名称就可以拿到对象**/
- public final static String SHARED_MAIN = "main";
- /**SharedPreferences中储存数据的Key名称**/
- public final static String KEY_NAME = "name";
- public final static String KEY_NUMBER = "number";
- /**SharedPreferences中储存数据的路径**/
- public final static String DATA_URL = "/data/data/";
- public final static String SHARED_MAIN_XML = "main.xml";
- @Override
- protected void onCreate(Bundle savedInstanceState) {
- setContentView(R.layout.sharedpreferences);
- /**拿到名称是SHARED_MAIN 的SharedPreferences对象**/
- mShared = getSharedPreferences(SHARED_MAIN, Context.MODE_PRIVATE);
- /**拿到SharedPreferences中保存的数值 第二个参数为如果SharedPreferences中没有保存就赋一个默认值**/
- String name = mShared.getString(KEY_NAME, "数据库中没有储存姓名");
- String number = mShared.getString(KEY_NUMBER, "数据库中没有储存号码");
- final EditText editName = (EditText)findViewById(R.id.sp_et0);
- final EditText editNumber = (EditText)findViewById(R.id.sp_et1);
- editName.setHint("上次输入的姓名为【 " +name+"】");
- editNumber.setHint("上次输入的号码为【 " +number+"】");
- Button button0 = (Button)findViewById(R.id.sp_button0);
- /**监听按钮点击后保存用户输入信息到SharedPreferences中**/
- button0.setOnClickListener(new OnClickListener() {
- @Override
- public void onClick(View arg0) {
- /**拿到用户输入的信息**/
- String name = editName.getText().toString();
- String number = editNumber.getText().toString();
- /**开始保存入SharedPreferences**/
- Editor editor = mShared.edit();
- editor.putString(KEY_NAME, name);
- editor.putString(KEY_NUMBER, number);
- /**put完毕必需要commit()否则无法保存**/
- editor.commit();
- ShowDialog("保存SharedPreferences成功");
- }
- });
- Button button1 = (Button)findViewById(R.id.sp_button1);
- button1.setOnClickListener(new OnClickListener() {
- @Override
- public void onClick(View arg0) {
- /**开始清除SharedPreferences中保存的内容**/
- Editor editor = mShared.edit();
- editor.remove(KEY_NAME);
- editor.remove(KEY_NUMBER);
- //editor.clear();
- editor.commit();
- ShowDialog("清除SharedPreferences数据成功");
- }
- });
- Button button2 = (Button)findViewById(R.id.sp_button2);
- button2.setOnClickListener(new OnClickListener() {
- @Override
- public void onClick(View arg0) {
- /** 删除SharedPreferences文件 **/
- File file = new File(DATA_URL + getPackageName().toString()
- + "/shared_prefs", SHARED_MAIN_XML);
- if (file.exists()) {
- file.delete();
- }
- ShowDialog("删除SharedPreferences文件成功");
- }
- });
- super.onCreate(savedInstanceState);
- }
- public void ShowDialog(String string) {
- AlertDialog.Builder builder = new AlertDialog.Builder(SPActivity.this);
- builder.setIcon(R.drawable.icon);
- builder.setTitle(string);
- builder.setPositiveButton("确定", new DialogInterface.OnClickListener() {
- public void onClick(DialogInterface dialog, int whichButton) {
- finish();
- }
- });
- builder.show();
- }
- }
- <?xml version="1.0" encoding="utf-8"?>
- <LinearLayout xmlns:android="http://schemas.android.com/apk/res/android"
- android:layout_width="fill_parent"
- android:layout_height="fill_parent"
- android:orientation="vertical"
- >
- <ImageView android:id="@+id/sp_image"
- android:layout_width="wrap_content"
- android:layout_height="wrap_content"
- android:src="@drawable/image"
- android:layout_gravity="center"
- />
- <EditText android:id="@+id/sp_et0"
- android:layout_width="fill_parent"
- android:layout_height="wrap_content"
- android:hint="请输入你的姓名">
- </EditText>
- <EditText android:id="@+id/sp_et1"
- android:layout_width="fill_parent"
- android:layout_height="wrap_content"
- android:hint="请输入你的号码">
- </EditText>
- <Button android:id="@+id/sp_button0"
- android:layout_width="wrap_content"
- android:layout_height="wrap_content"
- android:text="保存输入内容shared">
- </Button>
- <Button android:id="@+id/sp_button1"
- android:layout_width="wrap_content"
- android:layout_height="wrap_content"
- android:text="清除shared保存内容">
- </Button>
- <Button android:id="@+id/sp_button2"
- android:layout_width="wrap_content"
- android:layout_height="wrap_content"
- android:text="删除shared文件">
- </Button>
- </LinearLayout>
2.在本地data文件下使用自己生成的文件处理数据的 新建 储存 读取 删除
如果说不想把内容存在SharedPreferences中的话,我们可以自己写一个文件保存须要的数据,在这里我将文件保存在系统中的工程路径下。
输入需要保存的内容
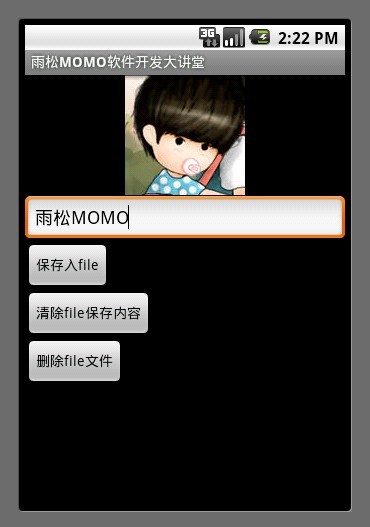
保存完毕后红框内呈现之前保存的数据
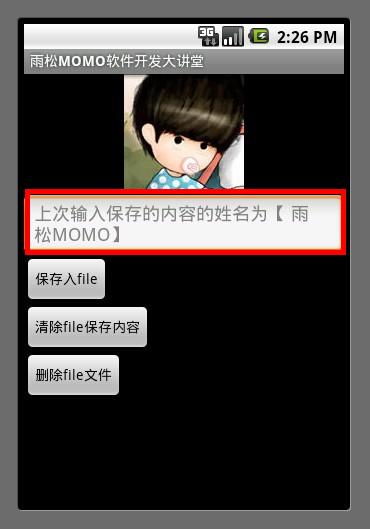
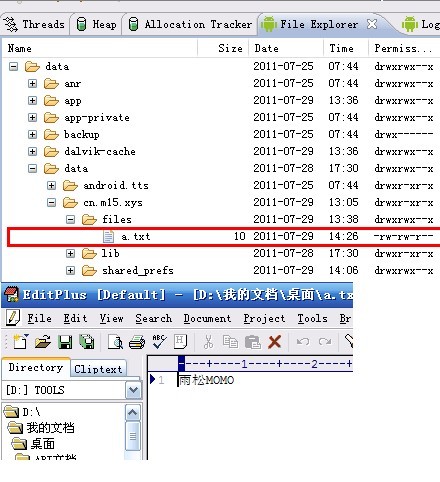
保存文件以后,文件被保存在了当前工程下 files 文件夹的路径下,这里说一下data文件夹 如果手机没有root 权限 用户是访问不到的,这种储存方式有一个麻烦的地方就是文件中保存的数据须要程序员自己去处理 , 好比文件中保存了很多字符串数据 但是我们只须要其中的一部分数据,这样就须要自己去写代码去从文件中拿需要的数据。
- public class FileActivity extends Activity {
- public final static String FILE_NAME = "a.txt";
- /**File中储存数据的路径**/
- public final static String DATA_URL = "/data/data/";
- @Override
- protected void onCreate(Bundle savedInstanceState) {
- setContentView(R.layout.file);
- /**读取内容**/
- String content = loadFile();
- if(content == null) {
- content ="上次没有输入内容请输入";
- }
- String str = "上次输入保存的内容的姓名为【 " +content + "】";
- final EditText editContent = ((EditText)findViewById(R.id.file_et0));
- editContent.setHint(str);
- Button button0 = (Button)findViewById(R.id.file_button0);
- /**监听按钮点击后保存用户输入信息到file中**/
- button0.setOnClickListener(new OnClickListener() {
- @Override
- public void onClick(View arg0) {
- /**拿到用户输入的信息**/
- String content = editContent.getText().toString();
- /**开始保存入file**/
- saveFile(content);
- ShowDialog("保存File文件成功");
- }
- });
- Button button1 = (Button)findViewById(R.id.file_button1);
- /**监听按钮点击后清空file中内容**/
- button1.setOnClickListener(new OnClickListener() {
- @Override
- public void onClick(View arg0) {
- cleanFile();
- ShowDialog("清空File文件成功");
- }
- });
- Button button2 = (Button)findViewById(R.id.file_button2);
- /**监听按钮点击后删除file文件**/
- button2.setOnClickListener(new OnClickListener() {
- @Override
- public void onClick(View arg0) {
- File file = new File(DATA_URL + getPackageName().toString()
- + "/files", FILE_NAME);
- if (file.exists()) {
- file.delete();
- }
- ShowDialog("删除file文件成功");
- }
- });
- super.onCreate(savedInstanceState);
- }
- /**
- * 保存内容
- * @param str
- */
- public void saveFile(String str) {
- try {
- FileOutputStream outStream = this.openFileOutput(FILE_NAME,
- Context.MODE_WORLD_READABLE);
- outStream.write(str.getBytes());
- outStream.close();
- } catch (FileNotFoundException e) {
- } catch (IOException e) {
- }
- }
- /**
- * 因为java删除文件内容只有一种实现方法,就是把整个文件重写,只是把须要删除的那一条记录去除掉
- */
- public void cleanFile() {
- //如果只须要删除文件中的一部分内容则须要在这里对字符串做一些操作
- String cleanStr = "";
- try {
- FileOutputStream outStream = this.openFileOutput(FILE_NAME,
- Context.MODE_WORLD_READABLE);
- outStream.write(cleanStr.getBytes());
- outStream.close();
- } catch (FileNotFoundException e) {
- } catch (IOException e) {
- }
- }
- public String loadFile() {
- try {
- FileInputStream inStream = this.openFileInput(FILE_NAME);
- ByteArrayOutputStream stream = new ByteArrayOutputStream();
- byte[] buffer = new byte[1024];
- int length = -1;
- while ((length = inStream.read(buffer)) != -1) {
- stream.write(buffer, 0, length);
- }
- stream.close();
- inStream.close();
- return stream.toString();
- } catch (FileNotFoundException e) {
- e.printStackTrace();
- } catch (IOException e) {
- }
- return null;
- }
- public void ShowDialog(String str) {
- AlertDialog.Builder builder = new AlertDialog.Builder(FileActivity.this);
- builder.setIcon(R.drawable.icon);
- builder.setTitle(str);
- builder.setPositiveButton("确定", new DialogInterface.OnClickListener() {
- public void onClick(DialogInterface dialog, int whichButton) {
- finish();
- }
- });
- builder.show();
- }
- }
- <?xml version="1.0" encoding="utf-8"?>
- <LinearLayout xmlns:android="http://schemas.android.com/apk/res/android"
- android:layout_width="fill_parent"
- android:layout_height="fill_parent"
- android:orientation="vertical"
- >
- <ImageView android:id="@+id/file_image"
- android:layout_width="wrap_content"
- android:layout_height="wrap_content"
- android:src="@drawable/jay"
- android:layout_gravity="center"
- />
- <EditText android:id="@+id/file_et0"
- android:layout_width="fill_parent"
- android:layout_height="wrap_content"
- android:hint="请输入需要保存的内容">
- </EditText>
- <Button android:id="@+id/file_button0"
- android:layout_width="wrap_content"
- android:layout_height="wrap_content"
- android:text="保存入file">
- </Button>
- <Button android:id="@+id/file_button1"
- android:layout_width="wrap_content"
- android:layout_height="wrap_content"
- android:text="清除file保存内容">
- </Button>
- <Button android:id="@+id/file_button2"
- android:layout_width="wrap_content"
- android:layout_height="wrap_content"
- android:text="删除file文件">
- </Button>
- </LinearLayout>
3.在本地程序res/raw中读取数据操作
Android 下提供了专门读取程序res/raw路径下资源的方法,但是没有提供写入raw内容的方法,也就是说只能读不能写,在做软件的时候有时须要读取大量的文字资源,由于这些资源文字在软件中不会改变所以无需去对它的内容重写修改,就可以使用raw来操作数据。
如图所示:在列表中读取.bin文件中的内容分别显示在listView中
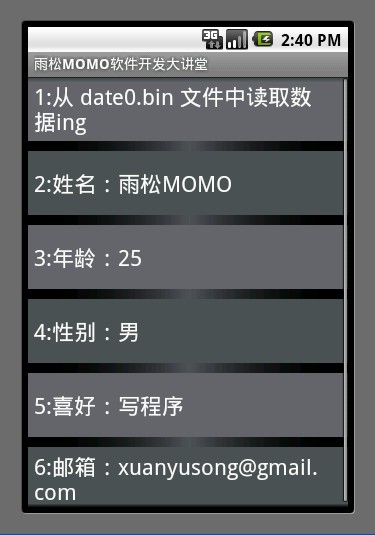
如图所示在raw路径下存了一个文件date0.bin ,下面是bin文件中保存的内容,程序中须要对这个.bin文件的内容进行读取并显示在屏幕中。
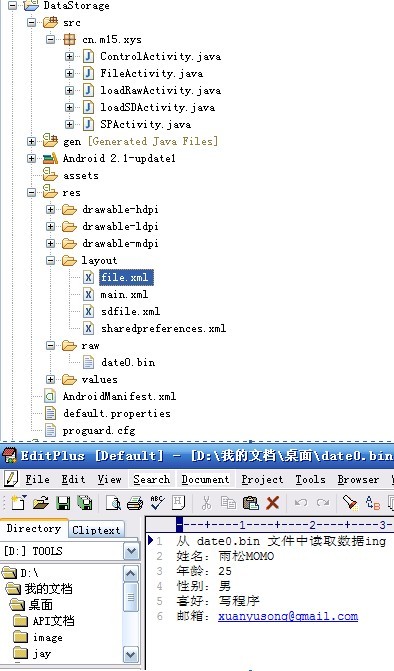
下面给出代码的实现
- public class loadRawActivity extends ListActivity {
- private class MyListAdapter extends BaseAdapter {
- private int[] colors = new int[] { 0xff626569, 0xff4f5257 };
- public MyListAdapter(Context context) {
- mContext = context;
- }
- public int getCount() {
- return inpormation.length;
- }
- @Override
- public boolean areAllItemsEnabled() {
- return false;
- }
- public Object getItem(int position) {
- return position;
- }
- public long getItemId(int position) {
- return position;
- }
- public View getView(int position, View convertView, ViewGroup parent) {
- TextView tv;
- if (convertView == null) {
- tv = (TextView) LayoutInflater.from(mContext).inflate(
- android.R.layout.simple_list_item_1, parent, false);
- } else {
- tv = (TextView) convertView;
- }
- int colorPos = position % colors.length;
- tv.setBackgroundColor(colors[colorPos]);
- tv.setText(String.valueOf(position + 1) + ":"
- + inpormation[position]);
- return tv;
- }
- private Context mContext;
- }
- String[] inpormation = null;
- ListView listView;
- @Override
- protected void onCreate(Bundle savedInstanceState) {
- readFile(R.raw.date0);
- setListAdapter(new MyListAdapter(this));
- listView = getListView();
- int[] colors = { 0, 0xFF505259, 0 };
- listView
- .setDivider(new GradientDrawable(Orientation.RIGHT_LEFT, colors));
- listView.setDividerHeight(10);
- super.onCreate(savedInstanceState);
- }
- /**
- * 从raw中读取数据
- * @param ID
- */
- public void readFile(int ID) {
- InputStream in = null;
- String temp = "";
- try {
- in = this.getResources().openRawResource(ID);
- byte[] buff = new byte[1024];// 缓存
- int rd = 0;
- ByteArrayOutputStream baos = new ByteArrayOutputStream();
- while ((rd = in.read(buff)) != -1) {
- baos.write(buff, 0, rd);
- temp = new String(baos.toByteArray(), "UTF-8");
- }
- baos.close();
- in.close();
- inpormation = temp.split("\r\n");
- } catch (Exception e) {
- Toast.makeText(this, "文件没有找到", 2000).show();
- }
- }
- }
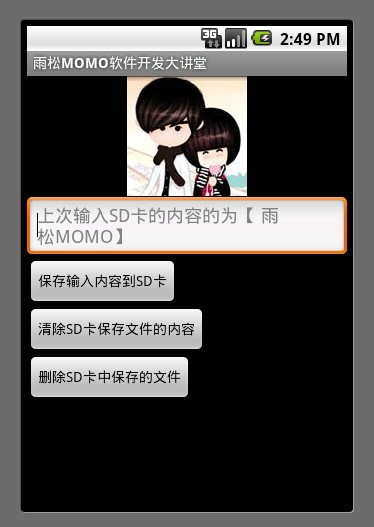
4.在SD卡中处理新建 写入 读取 删除 的操作
可以把数据保存在SD卡中,在SD卡中建立一个文件去保存数据,这里说一下 ,SD卡 用户是可以访问的,也就是说可以把一些可有可无的数据存在SD卡中,即使用户删除了卡中的内容也不会影像软件的使用。
- public class loadSDActivity extends Activity {
- public final static String FILE_NAME = "b.txt";
- @Override
- protected void onCreate(Bundle savedInstanceState) {
- setContentView(R.layout.sdfile);
- /**读取内容**/
- String content = loadFile();
- if(content == null) {
- content ="上次没有输入内容请输入";
- }
- final EditText editContent = (EditText)findViewById(R.id.sdfile_et0);
- editContent.setHint("上次输入SD卡的内容的为【 " +content + "】");
- Button button0 = (Button)findViewById(R.id.sdfile_button0);
- /**监听按钮点击后保存用户输入信息到SD卡中**/
- button0.setOnClickListener(new OnClickListener() {
- @Override
- public void onClick(View arg0) {
- /**拿到用户输入的信息**/
- String content = editContent.getText().toString();
- /**开始保存入SD卡**/
- saveFile(content);
- ShowDialog("保存SD卡文件成功");
- }
- });
- Button button1 = (Button)findViewById(R.id.sdfile_button1);
- /**去清除SD卡保存的内容**/
- button1.setOnClickListener(new OnClickListener() {
- @Override
- public void onClick(View arg0) {
- cleanFile();
- ShowDialog("清除SD卡文件中的内容成功");
- }
- });
- Button button2 = (Button)findViewById(R.id.sdfile_button2);
- /**删除SD卡保存的文件**/
- button2.setOnClickListener(new OnClickListener() {
- @Override
- public void onClick(View arg0) {
- DeleteSDFile();
- }
- });
- super.onCreate(savedInstanceState);
- }
- /**
- * 保存入SD卡中
- * @param str
- */
- public void saveFile(String str) {
- FileOutputStream fileOutputStream = null;
- File file = new File(Environment.getExternalStorageDirectory(),
- FILE_NAME);
- try {
- fileOutputStream = new FileOutputStream(file);
- fileOutputStream.write(str.getBytes());
- fileOutputStream.close();
- } catch (FileNotFoundException e) {
- e.printStackTrace();
- }catch (IOException e) {
- e.printStackTrace();
- }
- }
- /**
- * 读取SD卡的内容
- * @return
- */
- public String loadFile() {
- String path = Environment.getExternalStorageDirectory() +"/" + FILE_NAME;
- try {
- FileInputStream fi = new FileInputStream(path);
- BufferedReader br = new BufferedReader(new InputStreamReader(
- fi));
- String readString = new String();
- while ((readString = br.readLine()) != null) {
- //数据多的话须要在这里处理 readString
- return readString;
- }
- fi.close();
- } catch (FileNotFoundException e) {
- e.printStackTrace();
- } catch (IOException e) {
- e.printStackTrace();
- }
- return null;
- }
- /**
- * 删除SD卡
- */
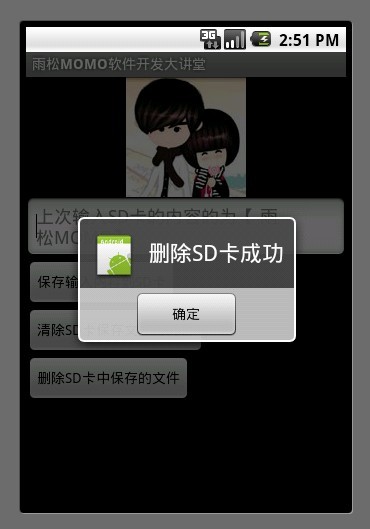
- public void DeleteSDFile() {
- String path = Environment.getExternalStorageDirectory() + "/"
- + FILE_NAME;
- File file1 = new File(path);
- boolean isdelte = file1.delete();
- if(isdelte) {
- ShowDialog("删除SD卡成功");
- }else {
- finish();
- }
- }
- /**
- * 因为java删除文件内容只有一种实现方法,就是把整个文件重写,只是把须要删除的那一条记录去除掉
- */
- public void cleanFile() {
- //如果只须要删除文件中的一部分内容则须要在这里对字符串做一些操作
- String cleanStr = "";
- FileOutputStream fileOutputStream = null;
- File file = new File(Environment.getExternalStorageDirectory(),
- FILE_NAME);
- try {
- fileOutputStream = new FileOutputStream(file);
- fileOutputStream.write(cleanStr.getBytes());
- fileOutputStream.close();
- } catch (FileNotFoundException e) {
- e.printStackTrace();
- }catch (IOException e) {
- e.printStackTrace();
- }
- }
- public void ShowDialog(String str) {
- AlertDialog.Builder builder = new AlertDialog.Builder(loadSDActivity.this);
- builder.setIcon(R.drawable.icon);
- builder.setTitle(str);
- builder.setPositiveButton("确定", new DialogInterface.OnClickListener() {
- public void onClick(DialogInterface dialog, int whichButton) {
- finish();
- }
- });
- builder.show();
- }
- }
- <?xml version="1.0" encoding="utf-8"?>
- <LinearLayout xmlns:android="http://schemas.android.com/apk/res/android"
- android:layout_width="fill_parent"
- android:layout_height="fill_parent"
- android:orientation="vertical"
- >
- <ImageView android:id="@+id/sdfile_image"
- android:layout_width="wrap_content"
- android:layout_height="wrap_content"
- android:src="@drawable/g"
- android:layout_gravity="center"
- />
- <EditText android:id="@+id/sdfile_et0"
- android:layout_width="fill_parent"
- android:layout_height="wrap_content"
- android:hint="请输入需要保存到SD卡的内容">
- </EditText>
- <Button android:id="@+id/sdfile_button0"
- android:layout_width="wrap_content"
- android:layout_height="wrap_content"
- android:text="保存输入内容到SD卡">
- </Button>
- <Button android:id="@+id/sdfile_button1"
- android:layout_width="wrap_content"
- android:layout_height="wrap_content"
- android:text="清除SD卡保存文件的内容">
- </Button>
- <Button android:id="@+id/sdfile_button2"
- android:layout_width="wrap_content"
- android:layout_height="wrap_content"
- android:text="删除SD卡中保存的文件">
- </Button>
- </LinearLayout>