对于任何软件来说,美观的界面都是用户体验的重要组成部分,它能提高整个软件的品质,给用户一个好的印象。界面的美观一般离不开各种图形图像资源。本节就来讲一讲Android开发中图形图像处理的一个最重要的类Drawable。Drawable就是一个可以画的对象的抽象(有点别扭,你凑合看吧)。
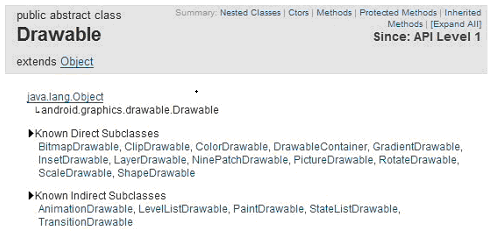
下面是它的继承关系,可以看到BitmapDrawable、AnimationDrawable等对象都是它的子类。

最简单的使用Drawable资源的方法是,把图片放入Android工程的res\drawable目录下,编程环境会自动在R类里为此资源创建一个引用。你可以使用此引用访问该资源对象。譬如对应用程序的图标,在Java代码中可以用R.drawable.icon引用到它,在XML中可以用@drawable/icon引用到它。
那么如果图片资源不在项目中而是在SDCard中时如何使用呢,我们看一下下面的例子学习一下Drawable的使用,并且顺便学习一下Bitmap和BitmapFactory的使用。
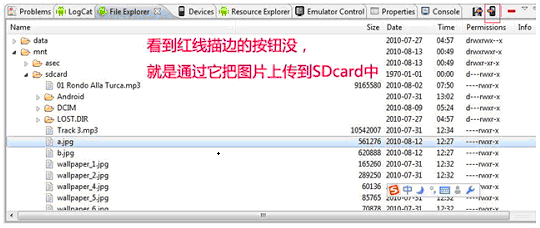
1、创建项目Lesson23_Drawable,主Acitivity的名字是MainDrawable.java,拷贝a.jpg和b.jpg两个文件到sdcard中。

2、res\main.xml的内容如下:
- <?xml version="1.0" encoding="utf-8"?>
- <LINEARLAYOUT xmlns:android="http://schemas.android.com/apk/res/android" android:layout_height="fill_parent" android:layout_width="fill_parent" android:orientation="vertical">
- <TEXTVIEW android:layout_height="wrap_content" android:layout_width="fill_parent" android:text="Drawable的使用-设置壁纸" android:textsize="20sp" />
- <BUTTON type=submit android:layout_height="wrap_content" android:layout_width="wrap_content" android:text="查看图片A" android:textsize="20sp" android:id="@+id/Button01">
- </BUTTON>
- <BUTTON type=submit android:layout_height="wrap_content" android:layout_width="wrap_content" android:text="查看图片B" android:textsize="20sp" android:id="@+id/Button02">
- </BUTTON>
- <BUTTON type=submit android:layout_height="wrap_content" android:layout_width="wrap_content" android:text="设置图片A为壁纸" android:textsize="20sp" android:id="@+id/Button03">
- </BUTTON>
- <BUTTON type=submit android:layout_height="wrap_content" android:layout_width="wrap_content" android:text="设置图片B为壁纸" android:textsize="20sp" android:id="@+id/Button04">
- </BUTTON>
- <BUTTON type=submit android:layout_height="wrap_content" android:layout_width="wrap_content" android:text="恢复默认壁纸" android:textsize="20sp" android:id="@+id/Button05">
- </BUTTON>
- <IMAGEVIEW android:layout_height="wrap_content" android:layout_width="wrap_content" android:id="@+id/ImageView01">
- </IMAGEVIEW>
- </LINEARLAYOUT>
3、MainDrawable.java的内容如下:
- package android.basic.lesson23;
- import java.io.IOException;
- import android.app.Activity;
- import android.graphics.BitmapFactory;
- import android.graphics.drawable.Drawable;
- import android.os.Bundle;
- import android.view.View;
- import android.view.View.OnClickListener;
- import android.widget.Button;
- import android.widget.ImageView;
- public class MainDrawable extends Activity {
- /** Called when the activity is first created. */
- @Override
- public void onCreate(Bundle savedInstanceState) {
- super.onCreate(savedInstanceState);
- setContentView(R.layout.main);
- //定义UI组件
- Button b1 = (Button) findViewById(R.id.Button01);
- Button b2 = (Button) findViewById(R.id.Button02);
- Button b3 = (Button) findViewById(R.id.Button03);
- Button b4 = (Button) findViewById(R.id.Button04);
- Button b5 = (Button) findViewById(R.id.Button05);
- final ImageView iv= (ImageView)findViewById(R.id.ImageView01);
- //定义按钮点击监听器
- OnClickListener ocl = new OnClickListener() {
- @Override
- public void onClick(View v) {
- switch (v.getId()) {
- case R.id.Button01:
- //给ImageView设置图片,从存储卡中获取图片为Drawable,然后把Drawable设置为ImageView的背景
- iv.setBackgroundDrawable(Drawable.createFromPath("/sdcard/a.jpg"));
- break;
- case R.id.Button02:
- iv.setBackgroundDrawable(Drawable.createFromPath("/sdcard/b.jpg"));
- break;
- case R.id.Button03:
- try {
- //Activity的父类ContextWrapper有这个setWallpaper方法,当然使用此方法需要有android.permission.SET_WALLPAPER权限
- setWallpaper(BitmapFactory.decodeFile("/sdcard/a.jpg"));
- } catch (IOException e1) {
- e1.printStackTrace();
- }
- break;
- case R.id.Button04:
- try {
- setWallpaper(BitmapFactory.decodeFile("/sdcard/b.jpg"));
- } catch (IOException e1) {
- e1.printStackTrace();
- }
- break;
- case R.id.Button05:
- try {
- //Activity的父类ContextWrapper有这个clearWallpaper方法,作用是恢复默认壁纸,当然使用此方法需要有android.permission.SET_WALLPAPER权限
- clearWallpaper();
- } catch (IOException e) {
- e.printStackTrace();
- }
- break;
- }
- }
- };
- //给按钮们绑定点击监听器
- b1.setOnClickListener(ocl);
- b2.setOnClickListener(ocl);
- b3.setOnClickListener(ocl);
- b4.setOnClickListener(ocl);
- b5.setOnClickListener(ocl);
- }
- }
4、AndroidManifest.xml的内容如下(设置权限):
- <?xml version="1.0" encoding="utf-8"?>
- <MANIFEST android:versionname="1.0" android:versioncode="1" xmlns:android="http://schemas.android.com/apk/res/android" package="android.basic.lesson23">
- <APPLICATION android:icon="@drawable/icon" android:label="@string/app_name">
- <ACTIVITY android:name=".MainDrawable" android:label="@string/app_name">
- <INTENT -filter>
- <ACTION android:name="android.intent.action.MAIN" />
- <CATEGORY android:name="android.intent.category.LAUNCHER" />
- </INTENT>
- </ACTIVITY>
- </APPLICATION>
- <USES android:minsdkversion="8" -sdk />
- <USES android:name="android.permission.SET_WALLPAPER" -permission></USES>
- </MANIFEST>
5、运行程序,查看结果。
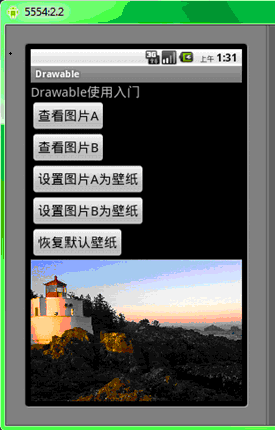
点击“查看图片A”按钮,ImageView载入图片A并显示出来:

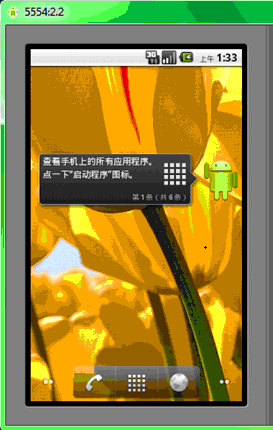
点击“设置图片B为壁纸”按钮,可以看到图片B已经成为桌面壁纸:

关于Drawable使用的内容就讲到这里了,大家可以自己多加练习,巩固一下这些知识。


发表评论:
◎欢迎参与讨论,请在这里发表您的看法、交流您的观点。